How to prepare a mixed dose of insulin
You will mix insulin from two bottles (vials). The order in which you mix the cloudy (long-acting) and clear (short or rapid-acting) insulin is important. Follow the order of the steps below.
Roll the cloudy insulin bottle gently between your hands.
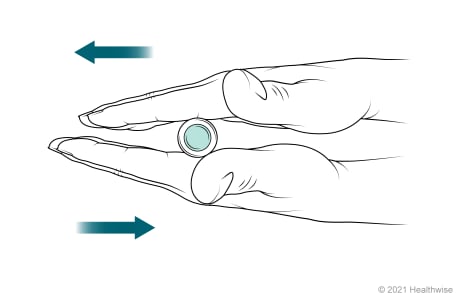
Roll the cloudy insulin bottle until all the white powder has dissolved.
Rolling the bottle warms the insulin if you have been keeping the bottle in the refrigerator.
Do not shake an insulin bottle.
Clean the lids of the bottles.
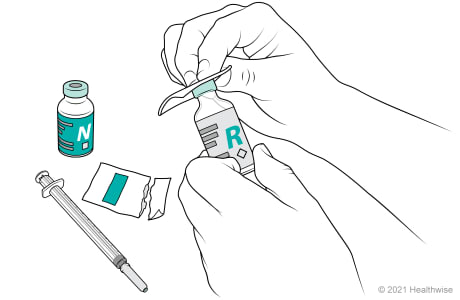
If you are using a bottle for the first time, remove the protective cover from the rubber lid.
If the rubber lid of the insulin bottle is dirty, clean it with an alcohol wipe or a cotton ball dipped in alcohol. Let the alcohol dry.
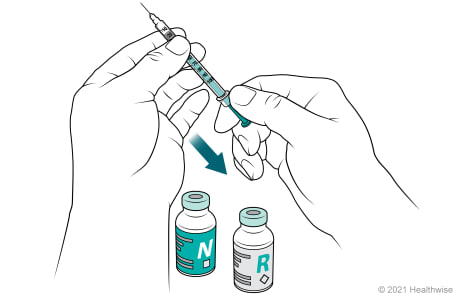
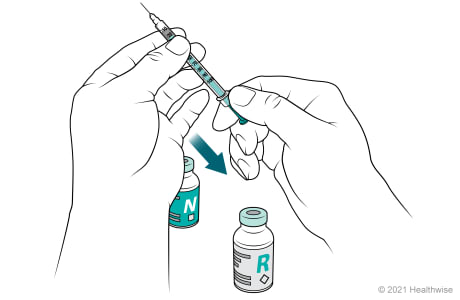
Draw air into the syringe for the cloudy insulin dose.
-
Remove the plastic cap that covers the needle on your insulin syringe. Important: Do not touch the needle.
-
Pull the plunger back on your insulin syringe and draw air into the syringe equal to the number of units of cloudy insulin to be given.
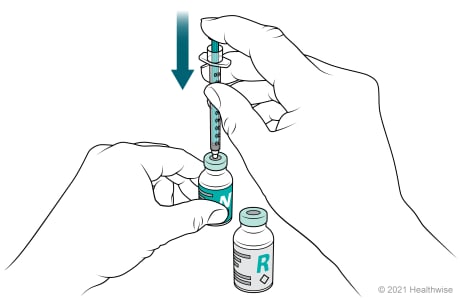
Force air into the cloudy insulin bottle.
-
Push the needle of the syringe into the rubber lid of the cloudy insulin bottle.
-
Push the plunger of the syringe to force the air into the bottle. This equalizes the pressure in the bottle when you later remove the dose of insulin.
-
Remove the needle from the bottle.
Draw air into the syringe for the clear insulin dose.
Pull the plunger of the syringe back and draw air into the syringe equal to the number of units of clear insulin to be given.
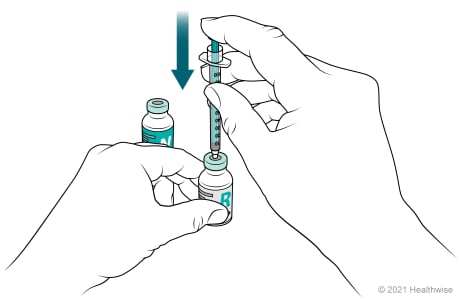
Force air into the clear insulin bottle.
-
Push the needle of the syringe into the rubber lid of the clear insulin bottle. Note: You will draw the clear insulin into the syringe first, then the cloudy insulin (Step 8). It is important to follow this order.
-
Push the plunger to force the air into the bottle. Leave the needle in place.
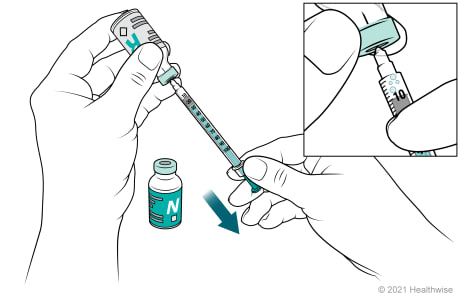
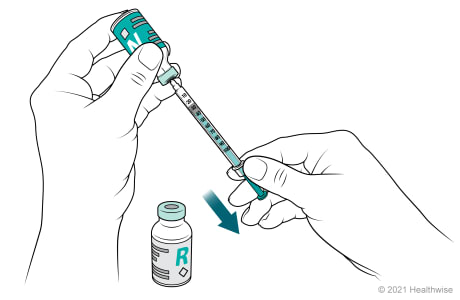
Draw clear insulin into the syringe.
-
Turn the bottle and syringe upside down. Position the tip of the needle so that it is below the surface of insulin in the bottle.
-
Pull back the plunger to fill the syringe with slightly more than the correct number of units of clear insulin to be given.
-
Tap the barrel of the syringe so that trapped air bubbles move into the needle area. Push the air bubbles back into the bottle. Important: Make sure that you have the correct number of units of insulin in your syringe.
-
Remove the needle from the clear insulin bottle.
Insert the needle into the cloudy insulin bottle.
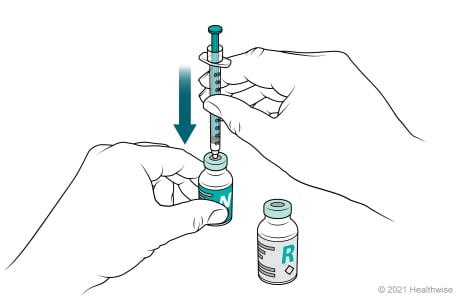
Insert the needle into the rubber lid of the cloudy insulin bottle.
Important: Do not push the plunger because this would force clear insulin into your cloudy insulin bottle. If clear insulin is mixed in the bottle of cloudy, it will alter the action of your other doses from that bottle.
Draw cloudy insulin into the syringe.
-
Turn the bottle and syringe upside down. Position the tip of the needle so that it is below the surface of insulin in the bottle.
-
Slowly pull back the plunger of the syringe to fill the syringe with the correct number of units of cloudy insulin to be given. This will prevent air bubbles entering the syringe.
-
Remove the needle from the bottle. You should now have the total number of units for the clear and cloudy insulin in your syringe. For example, if you need 10 units of clear and 15 units of cloudy, you should have 25 units in your syringe. Now you are ready to give the shot.
Current as of: April 30, 2024
Author:
All Ignite Healthwise, LLC education is reviewed by a team that includes physicians, nurses, advanced practitioners, registered dieticians, and other healthcare professionals.
This information does not replace the advice of a doctor. Ignite Healthwise, LLC, disclaims any warranty or liability for your use of this information. Your use of this information means that you agree to the
To learn more about Ignite Healthwise, LLC, visit
© 2024-2025 Ignite Healthwise, LLC.
Page Footer
I want to...
Audiences
Secure Member Sites
The Cigna Group Information
Disclaimer
Individual and family medical and dental insurance plans are insured by Cigna Health and Life Insurance Company (CHLIC), Cigna HealthCare of Arizona, Inc., Cigna HealthCare of Illinois, Inc., Cigna HealthCare of Georgia, Inc., Cigna HealthCare of North Carolina, Inc., Cigna HealthCare of South Carolina, Inc., and Cigna HealthCare of Texas, Inc. Group health insurance and health benefit plans are insured or administered by CHLIC, Connecticut General Life Insurance Company (CGLIC), or their affiliates (see
All insurance policies and group benefit plans contain exclusions and limitations. For availability, costs and complete details of coverage, contact a licensed agent or Cigna sales representative. This website is not intended for residents of New Mexico.